Admin Settings is the single tabbed surface where an Admin configures everything tenant-wide: company letterhead, capacity warnings, audit thresholds, the fiscal-year boundary, and Release Order behaviour. Each tab is an independent panel — saving one panel does not touch the others, and the page never reloads the whole form. Tabs your tenant doesn't have enabled are simply not shown.
Step 1 — Open Admin Settings
From the top navigation, choose Setup → Admin Settings. The page opens on the Company / Branding tab with a sticky horizontal row of tabs pinned under the top bar. Click any tab to switch panels. (There is no customer-facing Plan tab — ColdIQ is a single all-inclusive plan, so plan changes are handled with the sales team, not self-served here; see Step 6.)
The tabs that exist (subject to the features enabled for your tenant):
- Company / Branding — letterhead name, GSTIN, and logo used on receipt and invoice PDFs. Always visible.
- Capacity — overstock warning thresholds.
- Anomaly rules — Tier-A anomaly thresholds and per-user alert channels (needs the anomaly engine enabled).
- Geofence — clock-in geofence centre and radius.
- Audit thresholds — duplicate-entry window, operator backdate limit, and after-hours window.
- Operations profile — cash-only and similar operational switches.
- Billing cadence — fiscal-year anchor (preset or custom annual date) and PDF bag-size column.
- Release Orders — RO approval mode, default validity, FIFO auto-consume (needs Bonds / Release Orders enabled).
- Audit integrity — hash-chain enforcement mode (needs the audit-trail viewer enabled).

Step 2 — Company / Branding
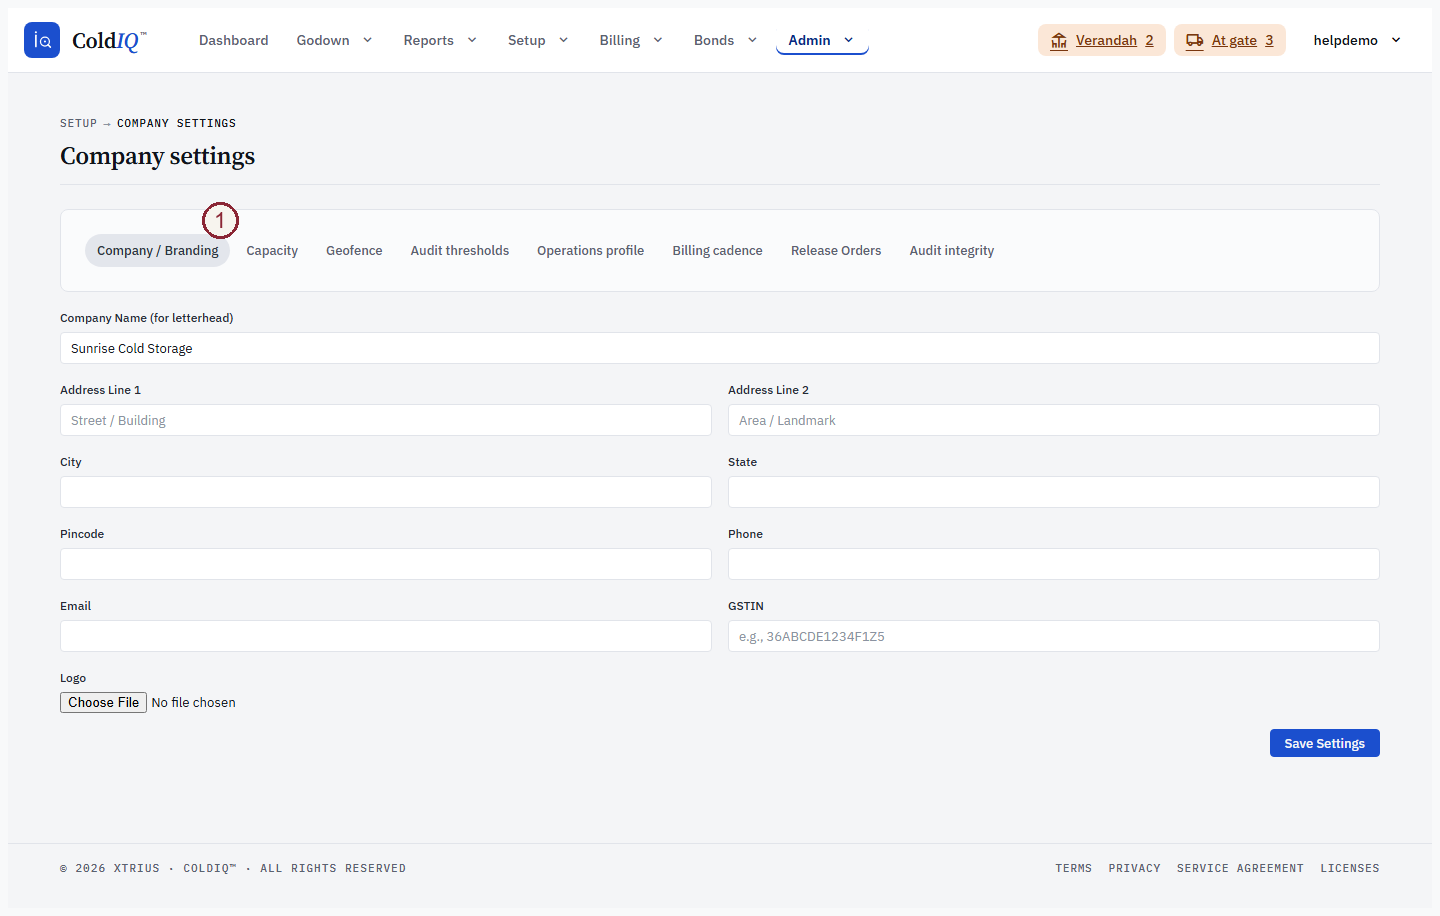
The Company / Branding tab loads its form on open. Set the Company Name (for letterhead), GSTIN, and upload a logo — these render on receipt and invoice PDFs. If you have cold-storage farmer-paid insurance inwards without a matching insurance rate-card, a warning banner appears here. Save the panel and the toast confirms.
Step 3 — Audit thresholds
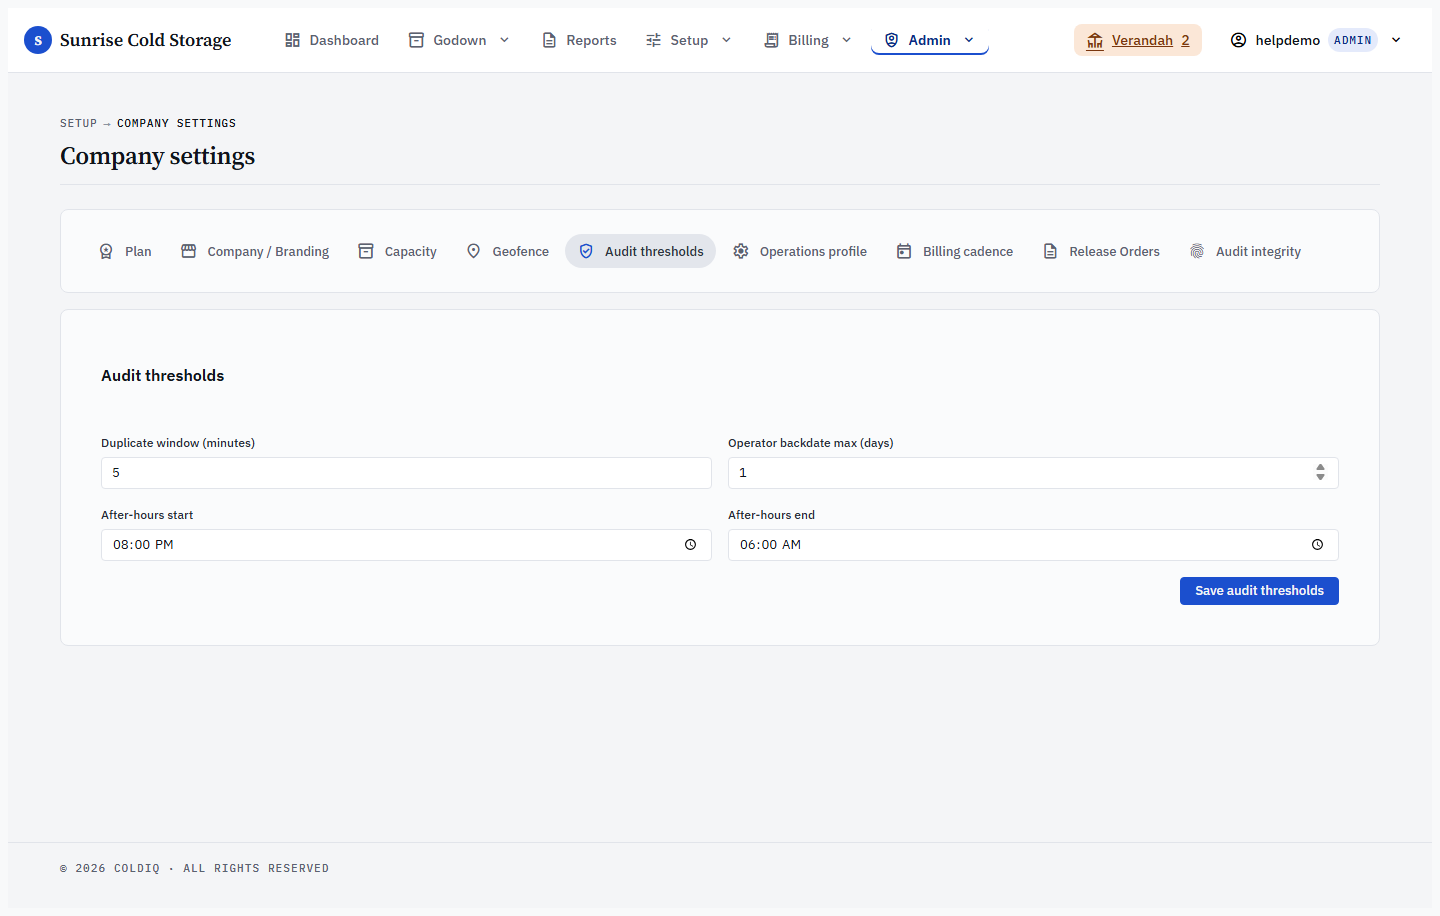
The Audit thresholds tab sets the duplicate-entry window (minutes within which a repeated stock entry is flagged as a likely duplicate), the operator backdate limit (how many days back a non-admin may date an entry), and the after-hours window (start/end times that mark an entry as out-of-hours). These limits feed the override-validation prompts on stock entry.
Step 4 — Billing cadence (fiscal year anchor)
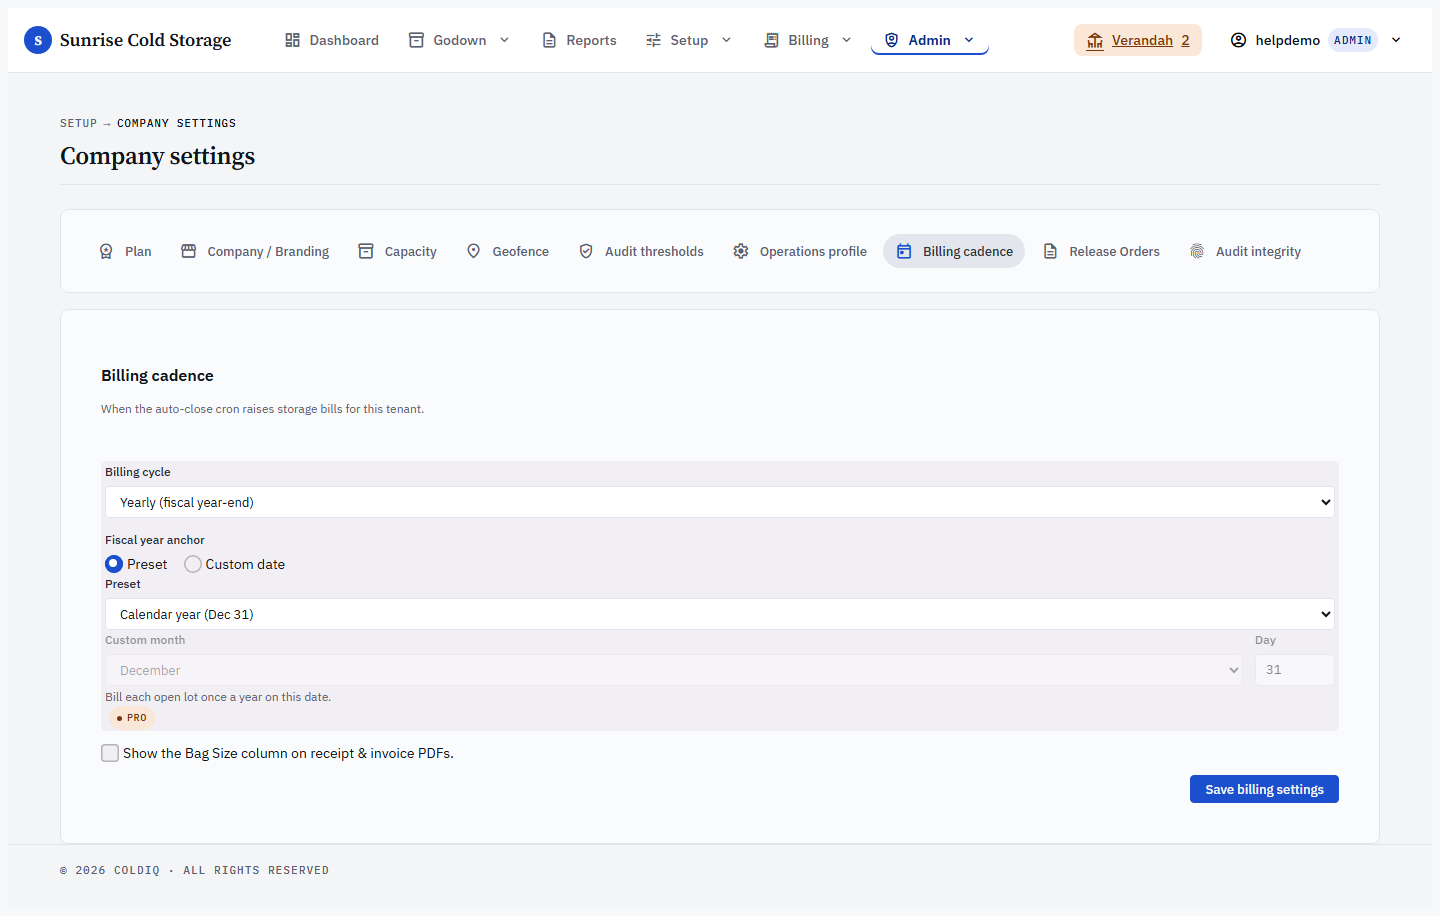
The Billing cadence tab carries the Fiscal year anchor — the setting that drives the year-end Auto-Close cron. Pick a preset — Calendar year (Dec 31) or Indian FY (Mar 31) — or switch to Custom date and choose any month and day of the year. (The earlier Jun 30 / Sep 30 presets were removed; set either as a custom date instead. A tenant already saved on one keeps billing on that date.) Impossible calendar days such as Apr 31 are rejected on save, and Feb 29 is not supported. You can also toggle Show the Bag Size column on receipt & invoice PDFs here. See the Auto-Close guide for what the boundary triggers.
This tab sets only the tenant-wide fiscal-year boundary. The billable-storage clock for an individual lot is set separately by its Billing Effective Date on the Stock Inward form (and editable on View Records until the first bill is raised) — not by a rate-card grace period. Storage charges accrue from that date forward.
Step 5 — Release Orders
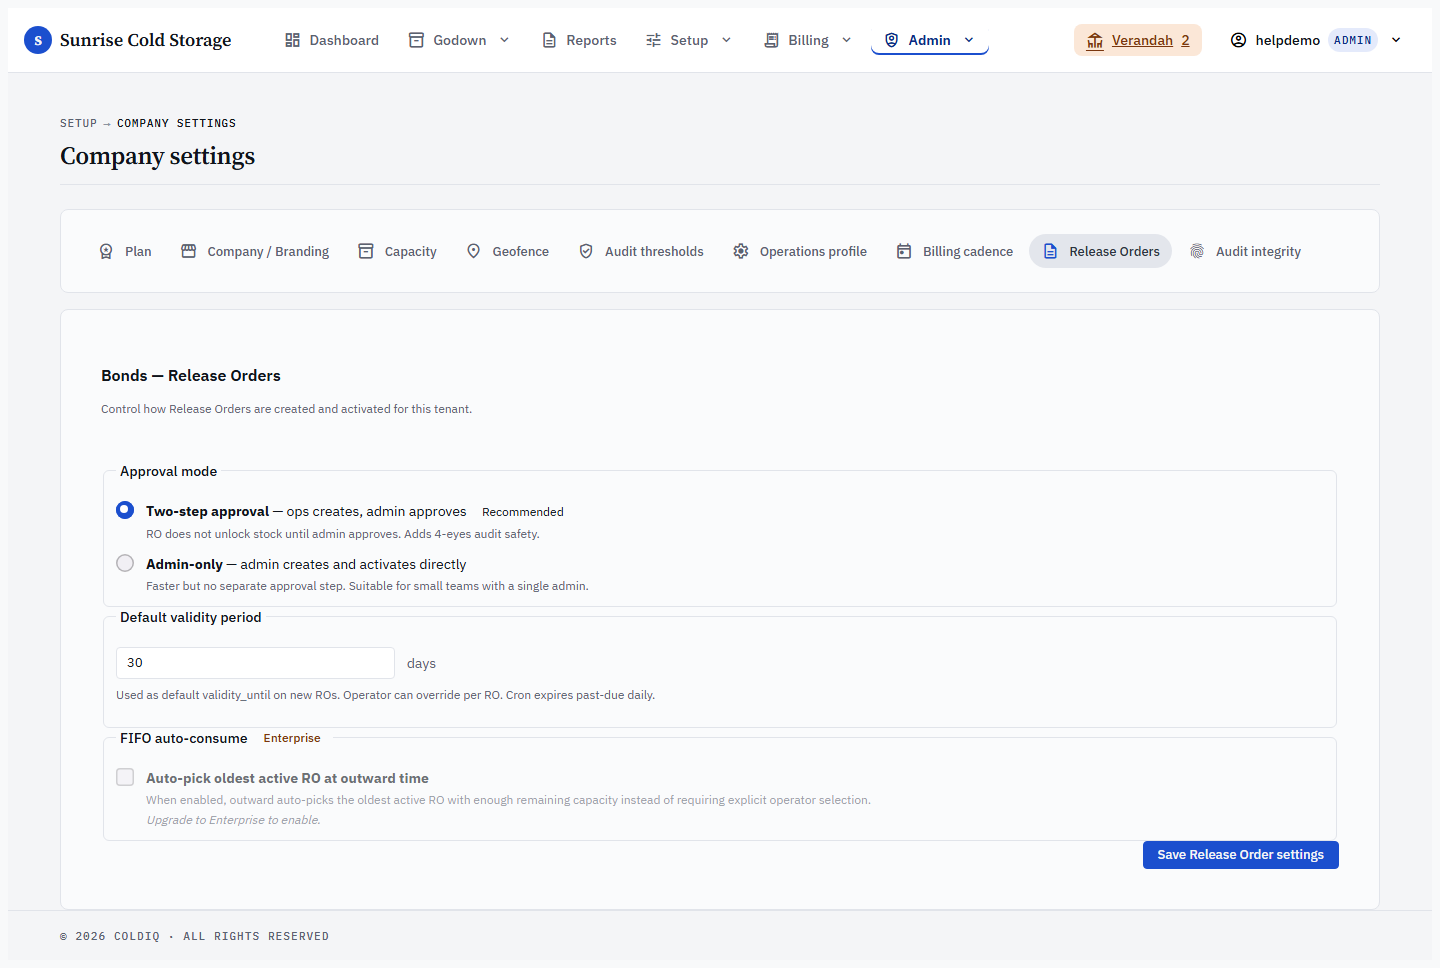
The Release Orders tab controls how ROs are created and activated:
- Approval mode — Two-step (ops creates, admin approves — recommended) or Admin-only (admin creates and activates directly).
- Default validity period — 1–365 days, used as the default
validity_untilon new ROs; operators can override per RO. - FIFO auto-consume — an optional feature. When on, outward auto-picks the oldest active RO with enough remaining capacity. The toggle is disabled (and server-hard-gated) when the feature isn't enabled for your tenant.
Step 6 — Request a plan upgrade
ColdIQ is a single all-inclusive plan, set up with the sales team at pilot — there is no self-serve plan picker in Settings. If you reach a feature your plan doesn't include, the upsell prompt on that page opens a Request upgrade modal pre-filled from your tenant record (company name and owner phone are auto-pulled — you only add an optional message). Submitting writes a hand-off row for the sales team; there is no in-app payment. The modal confirms with a "request sent" panel.
Branding
Branding in ColdStorage-Manager splits into two independent surfaces: the topbar (the brand shown in the app shell, on screen) and your documents (the letterhead printed on receipts, invoices, and PDFs). They are deliberately decoupled — the brand you see in the topbar does not decide what prints on your paperwork, and vice versa.
Topbar brand — ColdIQ on every plan
The brand lockup in the top-left of the app shell is the ColdIQ platform lockup for every tenant on every plan. It is not something you set on a switch, and no plan upgrade replaces it with your own logo or company name. You see the same ColdIQ lockup here that you see on the sign-in screen, from the moment you sign up. The white_label_branding feature flag no longer grants a custom topbar brand.
This is the on-screen app shell only — it does not change what prints on your paperwork (see below).

Documents carry the tenant identity independent of the topbar
Your printed documents always carry your facility's own identity regardless of what the topbar shows. The Company Name, GSTIN, address, contact details, and logo from the Company / Branding tab render on receipt and invoice PDFs for tenants on every plan — the statutory facility identifiers (address, GSTIN, phone, email) are never substituted, because invoices must keep the legally-required facility details. So a tenant whose topbar reads "ColdIQ" still prints its own company name and GSTIN on every receipt and invoice, and bond/release-order documents keep their own configured letterhead.
Per-location letterhead
If you run more than one facility, each Location can carry its own letterhead so that documents raised against that location print the right branch's name, address, and logo. This is edited per location, not on the Admin Settings page.
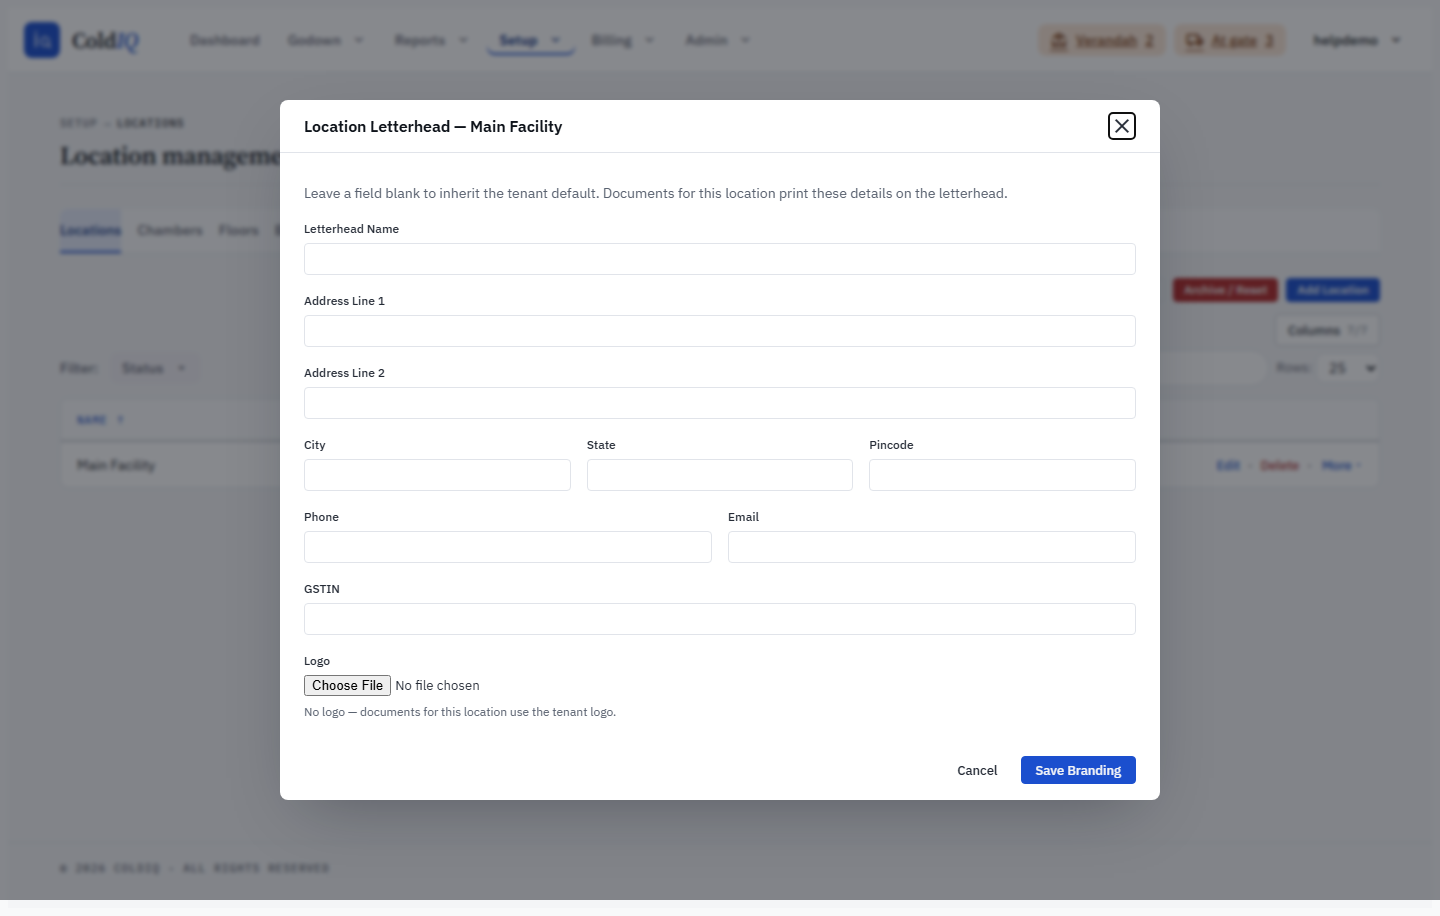
To set it, go to Setup → Locations, find the location row, and choose the Letterhead action. A modal opens with the location's letterhead fields:
- Letterhead Name, Address Line 1 / 2, City, State, Pincode, Phone, Email, and GSTIN.
- A per-location Logo upload, with a Remove logo (inherit tenant logo) checkbox once a logo is set.
Every field works on a per-field inherit basis: leave a field blank and that location's documents fall back to the tenant default you set on the Company / Branding tab. Fill a field in and it overrides the tenant default for documents raised against that location only. A blank logo (or removing one) means the location inherits the tenant logo.
If this breaks
- A tab you expected is missing — that feature isn't enabled for your tenant. The Capacity / Anomaly / Geofence / Audit / Operations / Billing-tuning tabs and FIFO auto-consume are each optional features. An upsell banner explains this at the bottom of the page when you lack the feature.
- "Invalid billing cadence…" — the fiscal-year anchor must be a real calendar day (Feb 29 is not supported). Pick a preset, or correct the custom month and day.
- "Approval mode must be 'two_step' or 'admin_only'." / "Validity days must be between 1 and 365." — Release Orders rejected the submitted value; re-pick the radio or correct the number.
- "Plan upgrade required." — that feature isn't enabled for your tenant; use the Request upgrade prompt on the upsell banner, or contact us.
- Upgrade request shows an error and doesn't send — the form re-renders with the validation message in place; fix the highlighted field and resubmit.
- Change your own password — that lives in the user menu in the top bar, not in Admin Settings.
- Topbar still shows "ColdIQ" after setting our company name and logo — that's by design. The app shell shows the ColdIQ platform lockup for every tenant, on every plan; it is never replaced by your own brand. Your documents still carry your company name and GSTIN regardless, so your paperwork is unaffected.
- A location's documents print the wrong (or tenant-default) name — that location's letterhead fields are blank, so they inherit the tenant default. Open Setup → Locations → Letterhead for that location and fill in the fields that should differ.
- "Invalid GSTIN format…" on the location letterhead — the per-location GSTIN must match the same format as the tenant GSTIN (e.g.
22AAAAA0000A1Z5). Correct it or leave it blank to inherit.
Related
See also: Roles & permissions, Module aliases, Auto-Close.