The Users page is where Admins create accounts, assign roles, deactivate people who have left, and issue temporary passwords. Only the Admin role can reach this page. Every account belongs to your tenant; soft-deleted users keep their audit history but can no longer sign in.
Step 1 — Open the Users page
From the top navigation, choose Admin → Users. The roster loads with one row per account, showing username, email, role, and active status. Use the search box and the Role / Status filters to narrow a long list.

Step 2 — Add a user
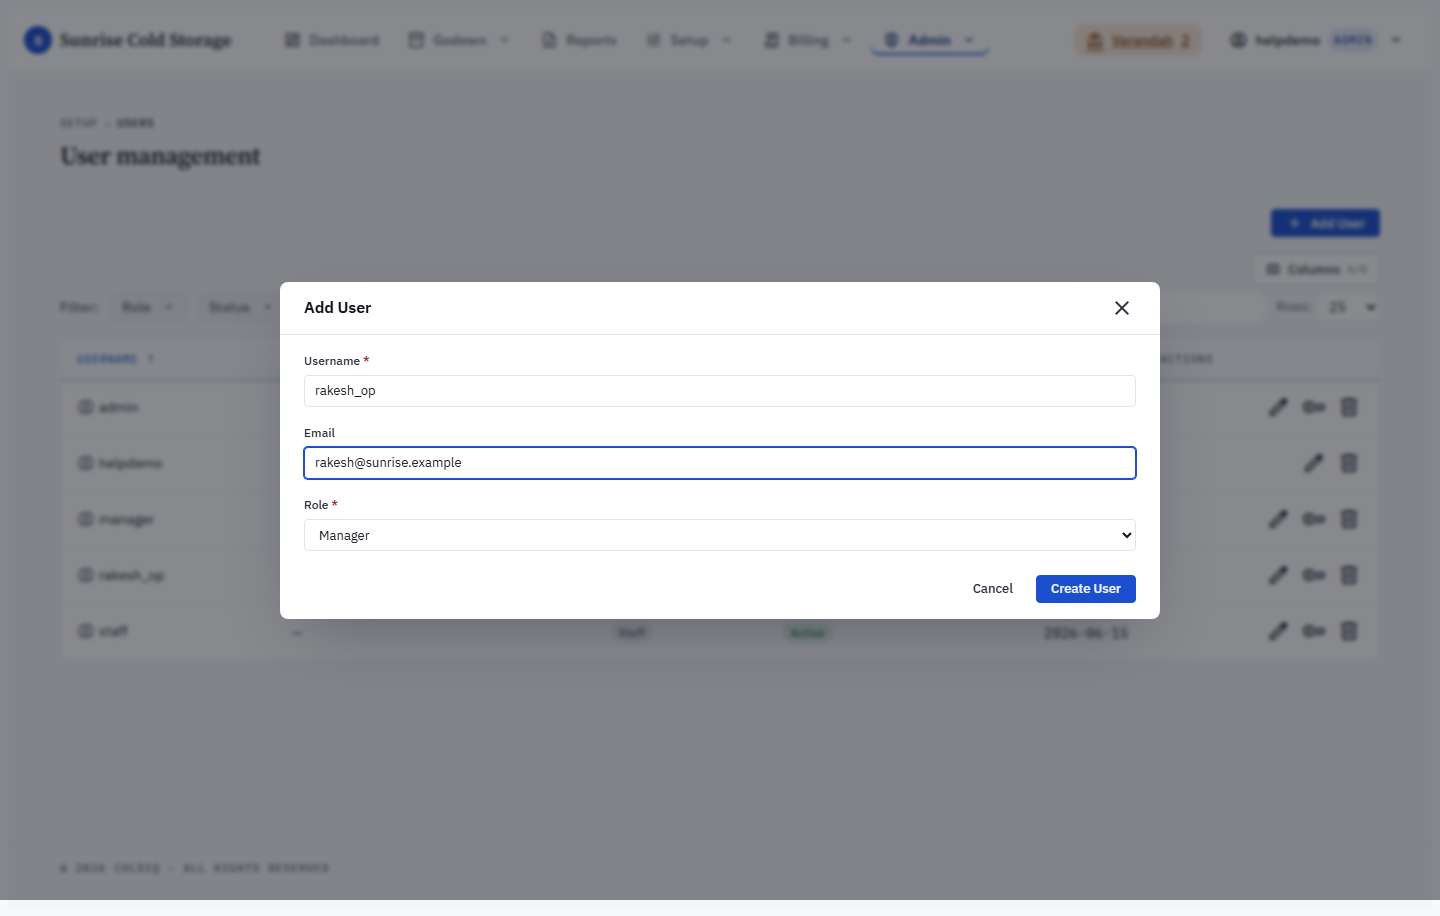
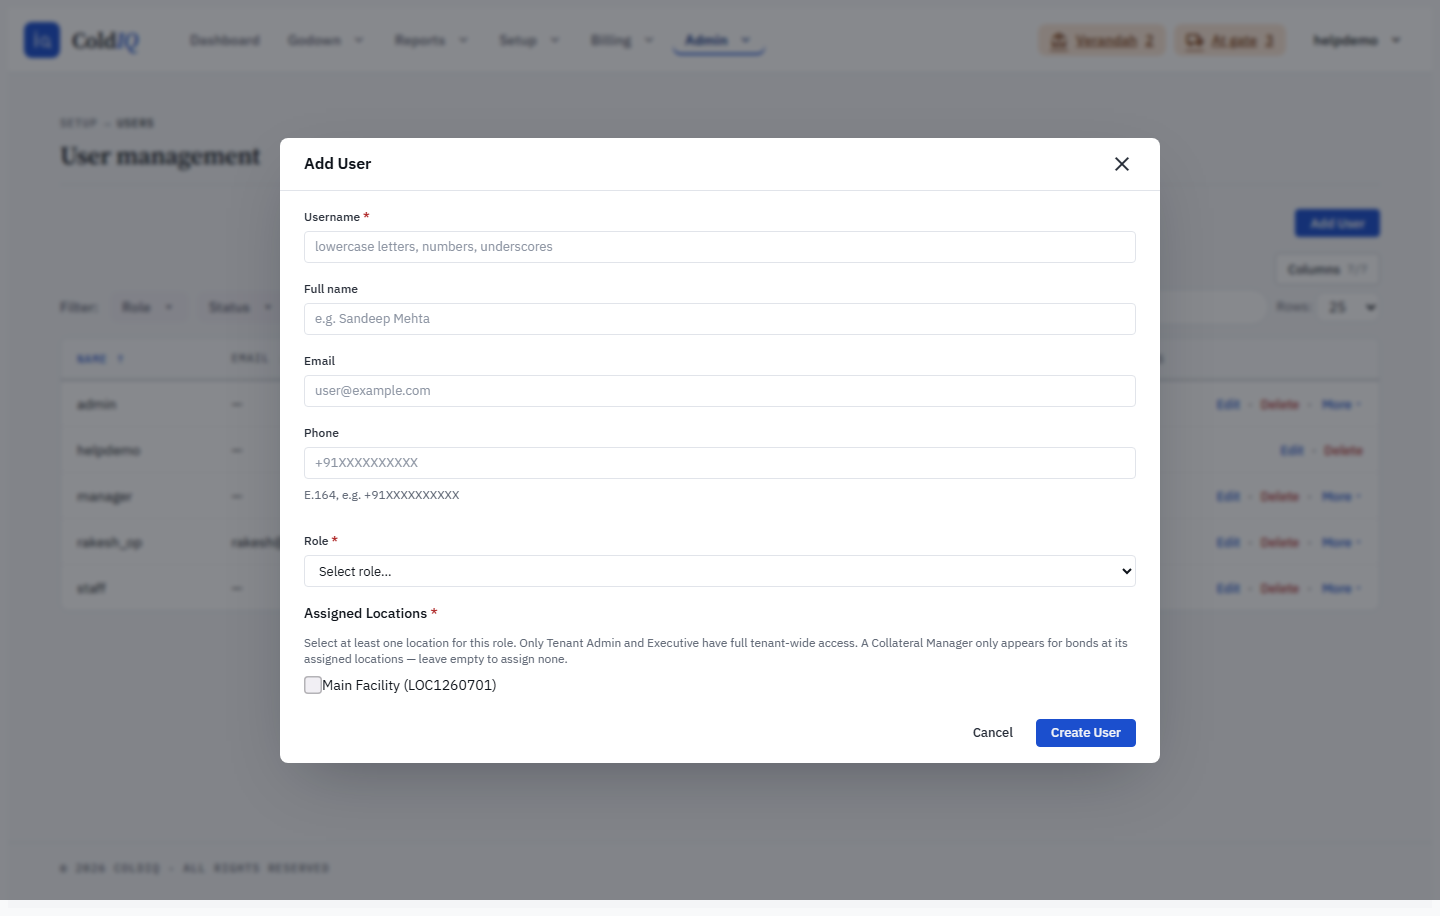
Press Add User. Fill in the form:
- Username (required) — at least 3 characters, lowercase letters, numbers, and underscores only. It is permanent; you cannot change it later.
- Email (optional) — must be a valid address if supplied.
- Role (required) — pick a built-in role (Admin, Manager, Staff, Accountant, Executive) or one of your tenant's custom roles.
- Assigned Locations — appears only when per-user location scope is enabled. Staff, Manager, and Accountant must be tied to at least one location; Admin and Executive always have tenant-wide access.
Step 3 — Hand over the temporary password
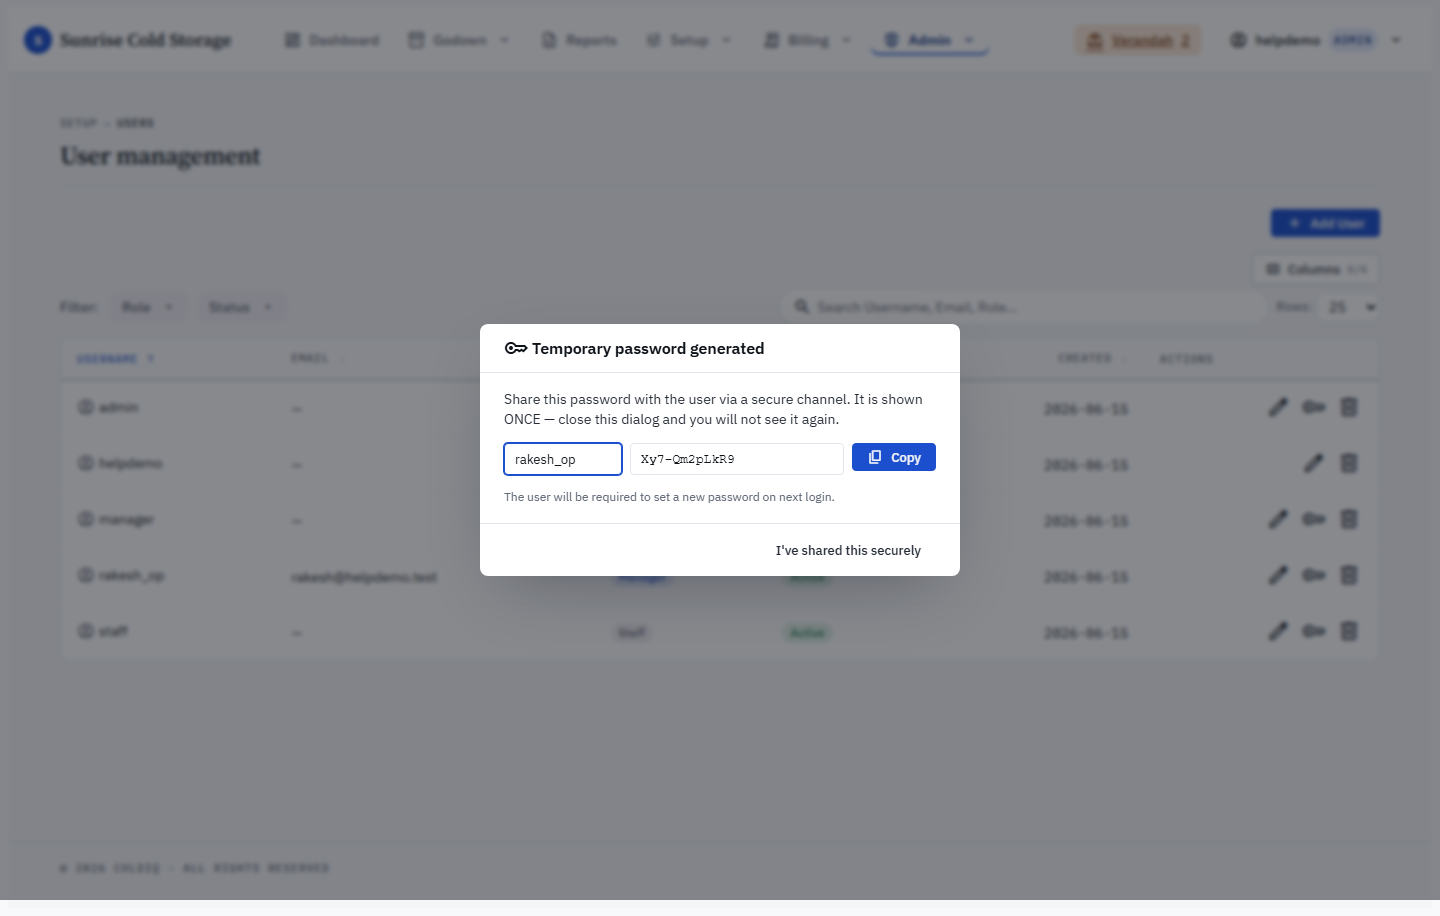
On Create User, the system generates a one-time temporary password and shows it once on screen. Copy it and pass it to the user securely — it is not stored in plaintext and cannot be retrieved again. The account is flagged so the user is forced to set their own password at first sign-in.
Step 4 — Edit a role or deactivate an account
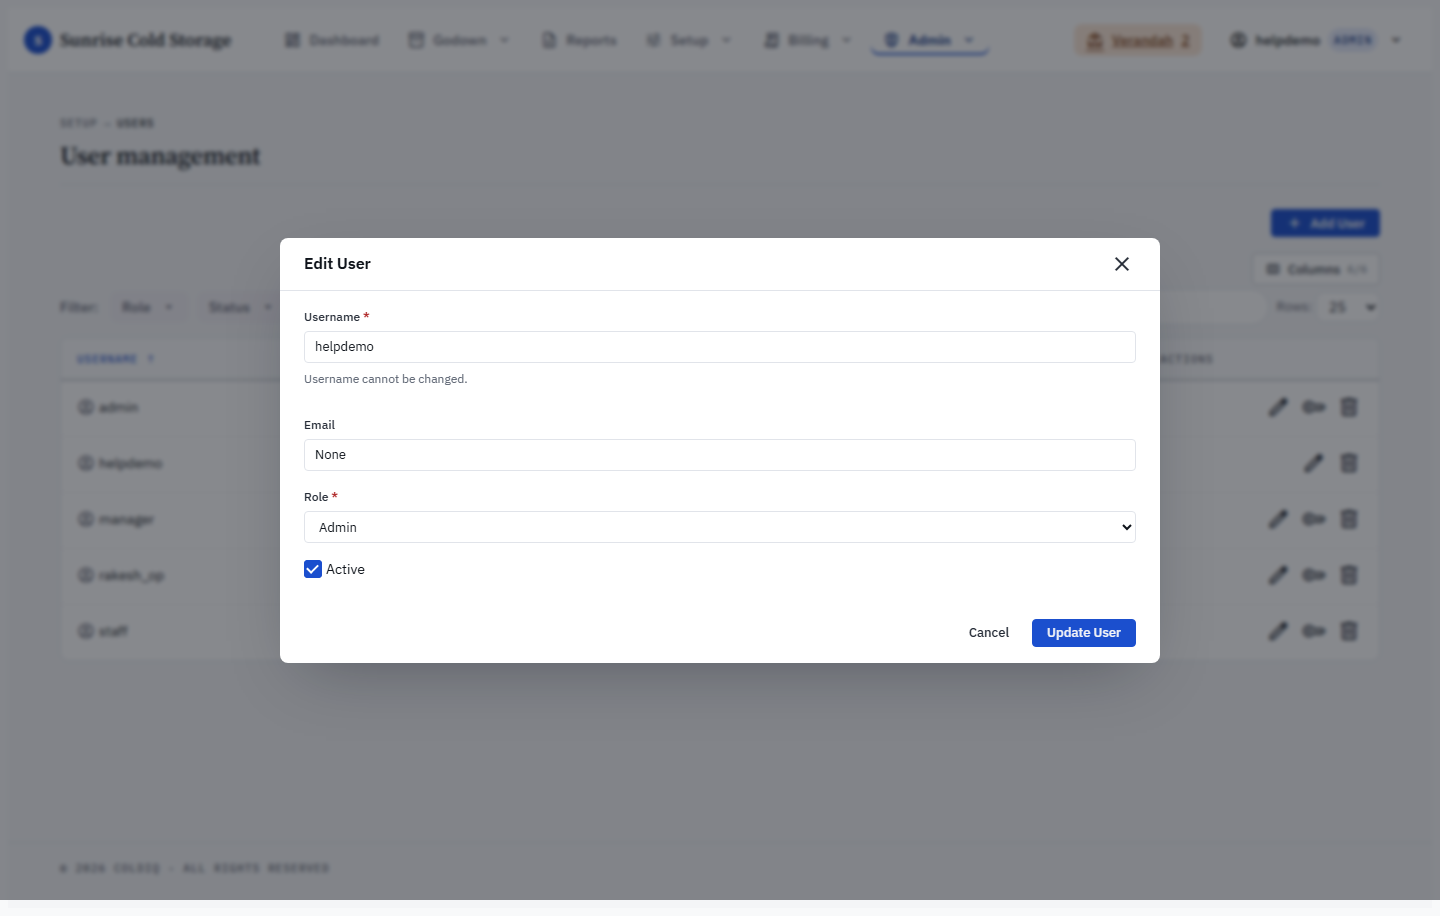
Click a user to open the edit form. You can change their role, update their email, and adjust location assignments. To deactivate someone (for example, on leave) untick the Active checkbox and save — they keep their account but cannot sign in until you re-activate. Use deactivation rather than deletion for temporary absences.
Step 5 — Reset a password
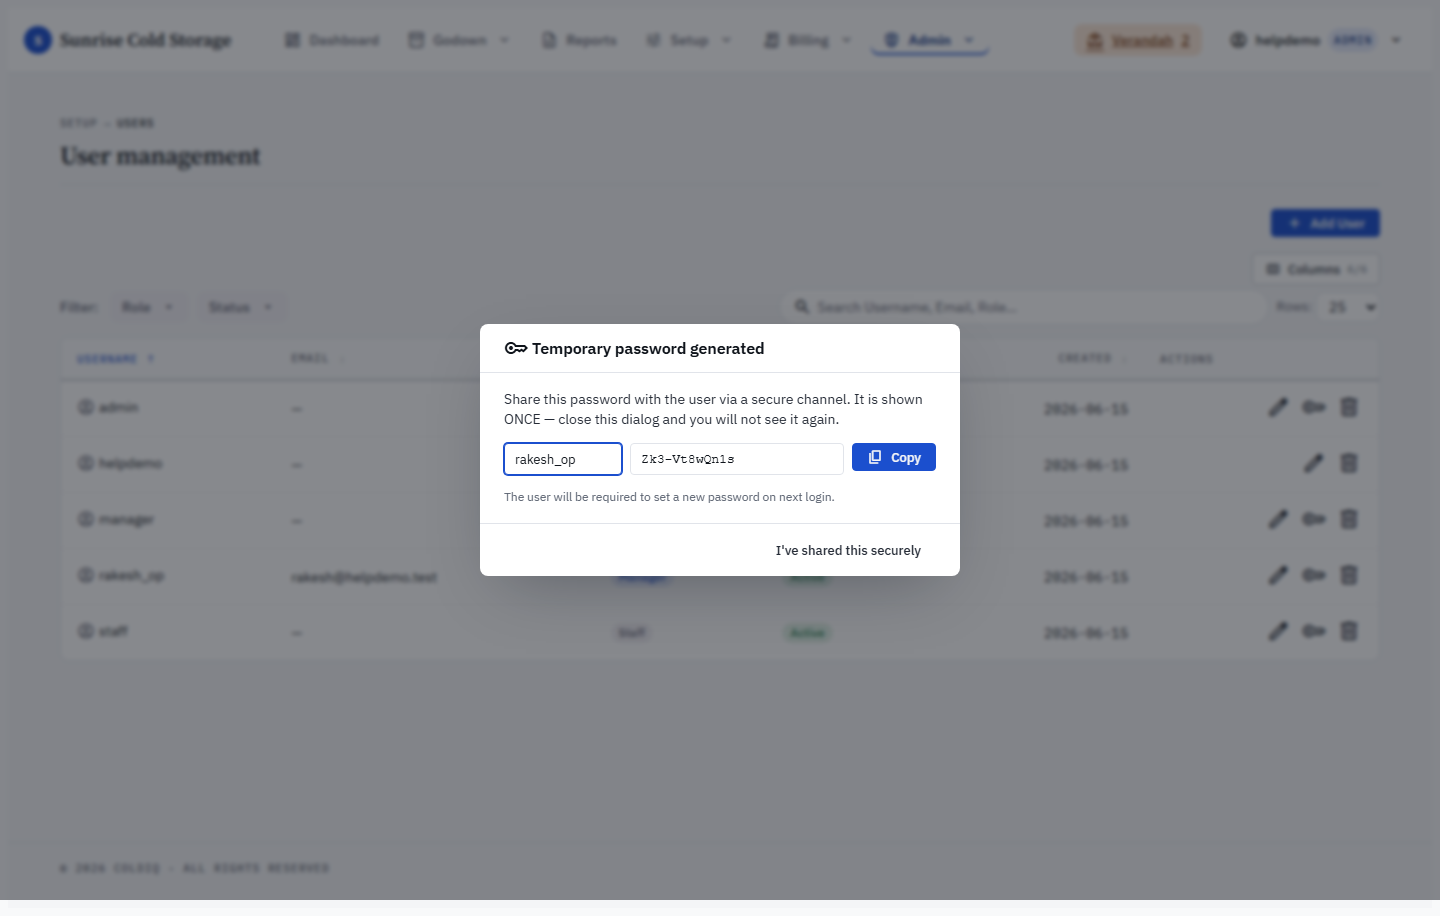
When a user is locked out or has forgotten their password, use Reset Password on their row. This generates a fresh one-time temporary password (shown once) and forces a password change at next sign-in. You cannot reset your own password here — use Change Password for that.
Step 6 — Delete a departed user
For someone who has left for good, use Delete. This is a soft delete: the row disappears from the roster and the user can no longer sign in, but their audit trail is preserved. Note that the deleted account still holds its username — a soft delete does not release it, so you cannot create a new account with the exact same username (use a different one). You cannot delete your own account.
Location scoping — limiting what a user sees
When the per-user location scope feature is enabled you can tie a user to one or more locations so that they only see the data for those locations. When it is off, every user reads tenant-wide data and the Assigned Locations field does not appear.
Two roles are always tenant-wide and can never be limited to a location: Tenant Admin and Executive. Every other role — Admin (delegated), Manager, Staff, Accountant, Gate Security, Collateral Manager, and any custom role — is locked to its assigned locations once the feature is on. The platform super-admin is always unrestricted because it works across tenants.
How the scope filters data:
- A scoped user sees only records (clients, stock, bonds, bills, gate passes, reports) whose location is one of their assigned locations. Records at other locations are treated as not found, never shown — so a scoped user cannot reach another location's record even by guessing its link.
- A scoped user with no location assigned sees nothing, and a banner asks them to have an Admin assign a location. That is why Staff, Manager, and Accountant must carry at least one location.
- A Collateral Manager's locations are optional. They are still saved, and they decide which bonds' assign-CM roster the person appears in; a Collateral Manager with no location is assigned to none.
To set or change a user's locations, open the user (Step 2 to add, Step 4 to edit) and tick the locations under Assigned Locations. The picker lists every location in your tenant — including ones outside your own scope — because assigning locations is an Admin action. Save to apply; the new scope takes effect on the user's next page load.
Client → location assignment
Clients are also tied to locations, so that location-scoped staff see only the clients that belong to their accessible locations. A single client can belong to many locations.
You set a client's locations on the Add / Edit Client form (under Clients), where the same per-user location scope feature turns on an Assigned Locations picker. When you create a new client, at least one location is required so the client is not invisible to scoped staff; editing an existing client keeps whatever you leave selected.
Two conveniences keep this low-effort:
- Quick Add from the inward flow ties the new client to the location you are working in.
- When stock first goes inward for a client at a location, the system automatically adds that client→location membership if it is missing — so a client always becomes visible where they actually have stock, even if you did not pre-assign them.
Existing clients were backfilled at upgrade from their stock, bond, and reservation history, so anyone with prior activity at a location is already assigned there.
If this breaks
- "Username must be at least 3 characters" — the username is too short; add characters.
- "Username must contain only lowercase letters, numbers, and underscores" — remove capitals, spaces, or symbols.
- "Username … already exists" — the username is taken. Note a soft-deleted account still holds its username, so a departed user's exact name stays reserved — pick a different one, or check whether the person already has an account.
- "Invalid email format" — fix the email or leave it blank.
- "Invalid role" — the selected role is not a built-in role or an active custom role; pick from the dropdown.
- "At least one assigned location is required for this role" — Staff / Manager / Accountant need at least one location when per-user location scope is on. Tick a location.
- A scoped user sees no data and a banner asks for a location — the user is location-scoped but has no location assigned. Open their account and tick at least one location under Assigned Locations.
- A scoped user can't see a client or its stock — the client is not assigned to any of that user's locations. Either add the location to the client (Edit Client → Assigned Locations) or add the location to the user. A client with prior inward stock at a location is auto-assigned there, so the gap is usually a freshly added client that was only tied to other locations.
- "Invalid assigned location" — a submitted location does not belong to your tenant; pick from the list shown.
- "At least one location is required" (on the Client form) — a new client must be tied to at least one location when per-user location scope is on. Tick a location.
- "Use Change Password to update your own password" — you tried to reset your own account; use Change Password instead.
- "You cannot delete your own account" — ask another Admin to remove your account if needed.
Related
See also: Roles, Audit Trail.